The Health Business Services (HBS) Portal has been upgraded. If you experience any issues or delays, please email ODC.Transformation@health.gov.au.
Understand the look and layout of the ODC Business Services inside the Health Business Services (HBS) portal.
Learn about common user interface patterns and functions to increase your speed and confidence using all the HBS portal services.
Getting started
You need to sign in to the Health Business Services (HBS) portal to access the ODC and TGA Business Services.
For help getting an account see: About Health Business Services.
ODC Business Service system roles
Different system roles ensure users only have access to the features and actions required for their responsibilities within an organisation.
For detailed information about system roles see: System roles within the ODC Business Service.
Common buttons found in the portal
These are buttons commonly found in the portal.
Bookmark or Save
Some pages may include a Bookmark or Save button. These allow you to save forms or items to your Saved or Bookmarked lists for easy access.
Bookmark and save buttons appear depending on the item or form you are looking at.
You can find your Saved or Bookmarked list by clicking on the 'Bookmarks' button within the ‘New draft’ section of the portal.
Upload and Attach Documents
The Upload and Attach Documents buttons allow you to find and attach files from your device to the portal.

You may need to upload documents when drafting an application or variation form.
If your upload isn’t in the correct format, an error message will occur and prompt you to change the upload.
Side menu navigation
The side navigation menu helps you to move between major sections of the portal. It remains fixed while you scroll page content.
The menu is optimised to allow you to quickly switch tasks without losing your place and provides the fastest way to move between high-level pages without navigating back to the dashboard.
You can use it to:
- begin a new task, like starting a form
- return to an existing draft or submission
- manage payments, documents or organisation details.
Features of the side menu
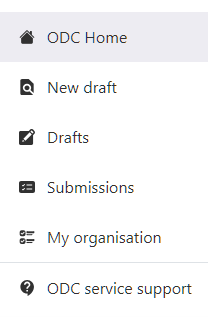
Each item in the side menu represents a key function in the portal.
From the side menu you can navigate to:
- Home – the main landing page with tiles and shortcuts
- New draft – a list of forms available to start new applications
- Drafts – saved drafts that have not yet been submitted
- Submissions – applications or forms that have been successfully submitted
- My organisation – organisation details and role-based information.
Click a menu item to visit the corresponding page.
An active page is highlighted with a light background and coloured left bar.
Icons for each section support quick scanning and accessibility.
Screenshot of icons on the side menu
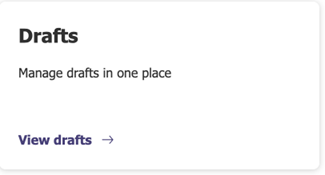
Cards (Tiles)
Cards provide quick access to the most used areas within the portal.
They appear on the homepage as cards.
Each card represents a page within the portal.
Tiles are designed to support task-based navigation - letting you start work immediately without searching through menus.
Use cards to access:
- Home – the main landing page with tiles and shortcuts
- New draft – a list of forms available to start new applications
- Drafts – saved drafts that have not yet been submitted
- Submissions – applications or forms that have been successfully submitted
- My organisation – organisation details and role-based information.
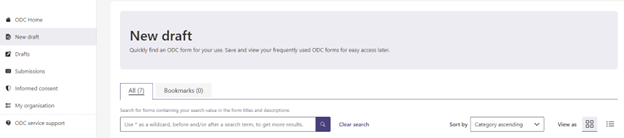
Search functionality
The search bar allows users to quickly find information within large lists, tables, and libraries. Search bars are presented throughout the portal and are located towards the top of the page.
Search is the quickest way to locate a record when you only know part of the name, date or ID. Combine it with wildcards for best results.

How search works
Search works in combination with table filters and sorting. It is case-sensitive and does not modify a dataset, it only refines what is shown.
You can use search when:
- the dataset is large (for example, hundreds of submissions or forms) and you need to refine your results
- looking for a specific ID, date, or form name
- searching by text is faster than using filters
- you want to find results across multiple fields at once.
The search field accepts a wide range of input types, including:
- Dates
- ID numbers
- Product names
- Organisation names
- Form titles
- Partial keywords
- Descriptions
- Status values (for example, draft and submitted).
Search using wildcards
A wildcard is an asterisk (*) before, after, or around a keyword to get broader results.
This helps find results even when you don’t know the full name or exact structure of what you’re searching for.
For example:
- *2026 - finds results that end with '2026'
- app* - finds results that starts with 'app' like 'application' or 'approval'
- *medical* - finds results that contain 'medical' anywhere in the text.
Clear search with one click
The 'Clear search' text allows you to remove the search term and reset the results instantly.
It appears to the right of the search bar.

Tables
Tables are used throughout the ODC Business Service to display information in a structured and easy-to-read format.
Information is organised into rows and columns, with each column representing a different type of data (for example, Form name, Description, Workflow step or Submitted date).
Tables are designed to help you manage and navigate large sets of information more efficiently.
Organising table data
You can filter and sort columns in tables to organise the data shown.
Tables show 10 records per page by default.
If the table contains more than 10 records, pagination controls appear below the table.
For example, ‘Showing 1 – 10 of 20’ means:
- page 1 contains records 1 to 10
- page 2 contains records 11 to 20.

Table buttons
These are commonly used buttons found on tables.
Actions button
The Actions button appears at the end of each table row.
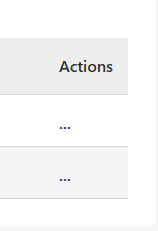
It provides access to context-specific actions for that item.
Common actions include:
- View details
- Edit submission (if still in draft)
- Upload or provide documents
- View history
- Download files
- Withdraw or resubmit (if permitted).
Export button
The Export button appears at the top-right of tables.

It allows you to take data offline for reporting or auditing.
The Export button:
- exports the current table view to CSV or Excel
- does not remove or change any active filters, sorting or search.
Table filters
Table filters are ideal for quickly narrowing down a dataset before using search or table column sorting to pinpoint the exact record you need.
Table filters are useful before applying search and table column sorting.
Use table filters:
- when the dataset is large and you want to narrow it before searching
- when preparing to sort or search the table after filtering.
Table filters sit above the table header, not inside the column headers.
You can only select from specific filter options.

How to use table filters
Locate the table filter above the table header.
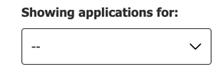
Click on the down arrow to open a list of values you can select from.
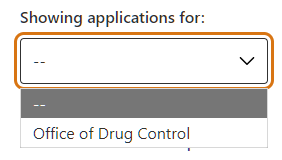
You can only select one value at a time and see those results.
When you select a value:
- the filter is applied immediately
- the table automatically updates
- only records matching the selected criteria are shown.
Select ‘–’ to remove the filter and show all available records.
Table column sorting
Table column sorting allows you to sort table data based on the values in a specific column.
This helps you quickly organise information and locate records in a logical sequence such as alphabetical order, numerical order, or by most recent date.
Table sorting can help you to:
- find the newest or oldest submissions (by date)
- order identifiers numerically (for example, submission numbers)
- arrange entries alphabetically by submission type
- quickly scan for groupings (for example, all “MI” types together).
Sorting saves time and improves readability, especially in large data tables.
Table column sorting is best applied after using search or table filters.
How to sort table columns
Locate the column header you wish to sort on your table.
Columns that support sorting display a sort icon (double ended arrow).

Examples include:
- Submission type
- Identifier
- Your reference
- Last updated.
Click on the column header you wish to sort.
This will make the data in the column immediately sort to either:
- ascending order (A-Z or oldest to newest)
- descending order (Z-A or newest to oldest).
A highlighted line appears under the ‘active’ column (the one you have clicked).

Clicking the column header again reverses the sorting order.
Only one column can be sorted at a time
When you sort a specific column:
- any previous column sorting is removed
- the active column is visually emphasised
- the table reflects the new order immediately.